
 create new ticket
 check ticket status
Smart Lists are an easy way to save common searches.
A Smart List can be created from the following search pages:
- CRM > Customers
- CRM > Contacts
- Quotes/Orders (All quotes/orders tabs)
- Production (All production tabs)
- Accounting > Commission
- Settings > Admin > Custom Export
- Stocks
- Supplies
- Customer Goods
- Accounts Receivable
- Deposits
- Payments
- Entries
- Task
- Records
- Products
Creating a Smart List
Step Action
1. Enter values for the search filters that you want to save.
2. Select {Search}. A floppy disk icon will appear to the right-hand side of All.
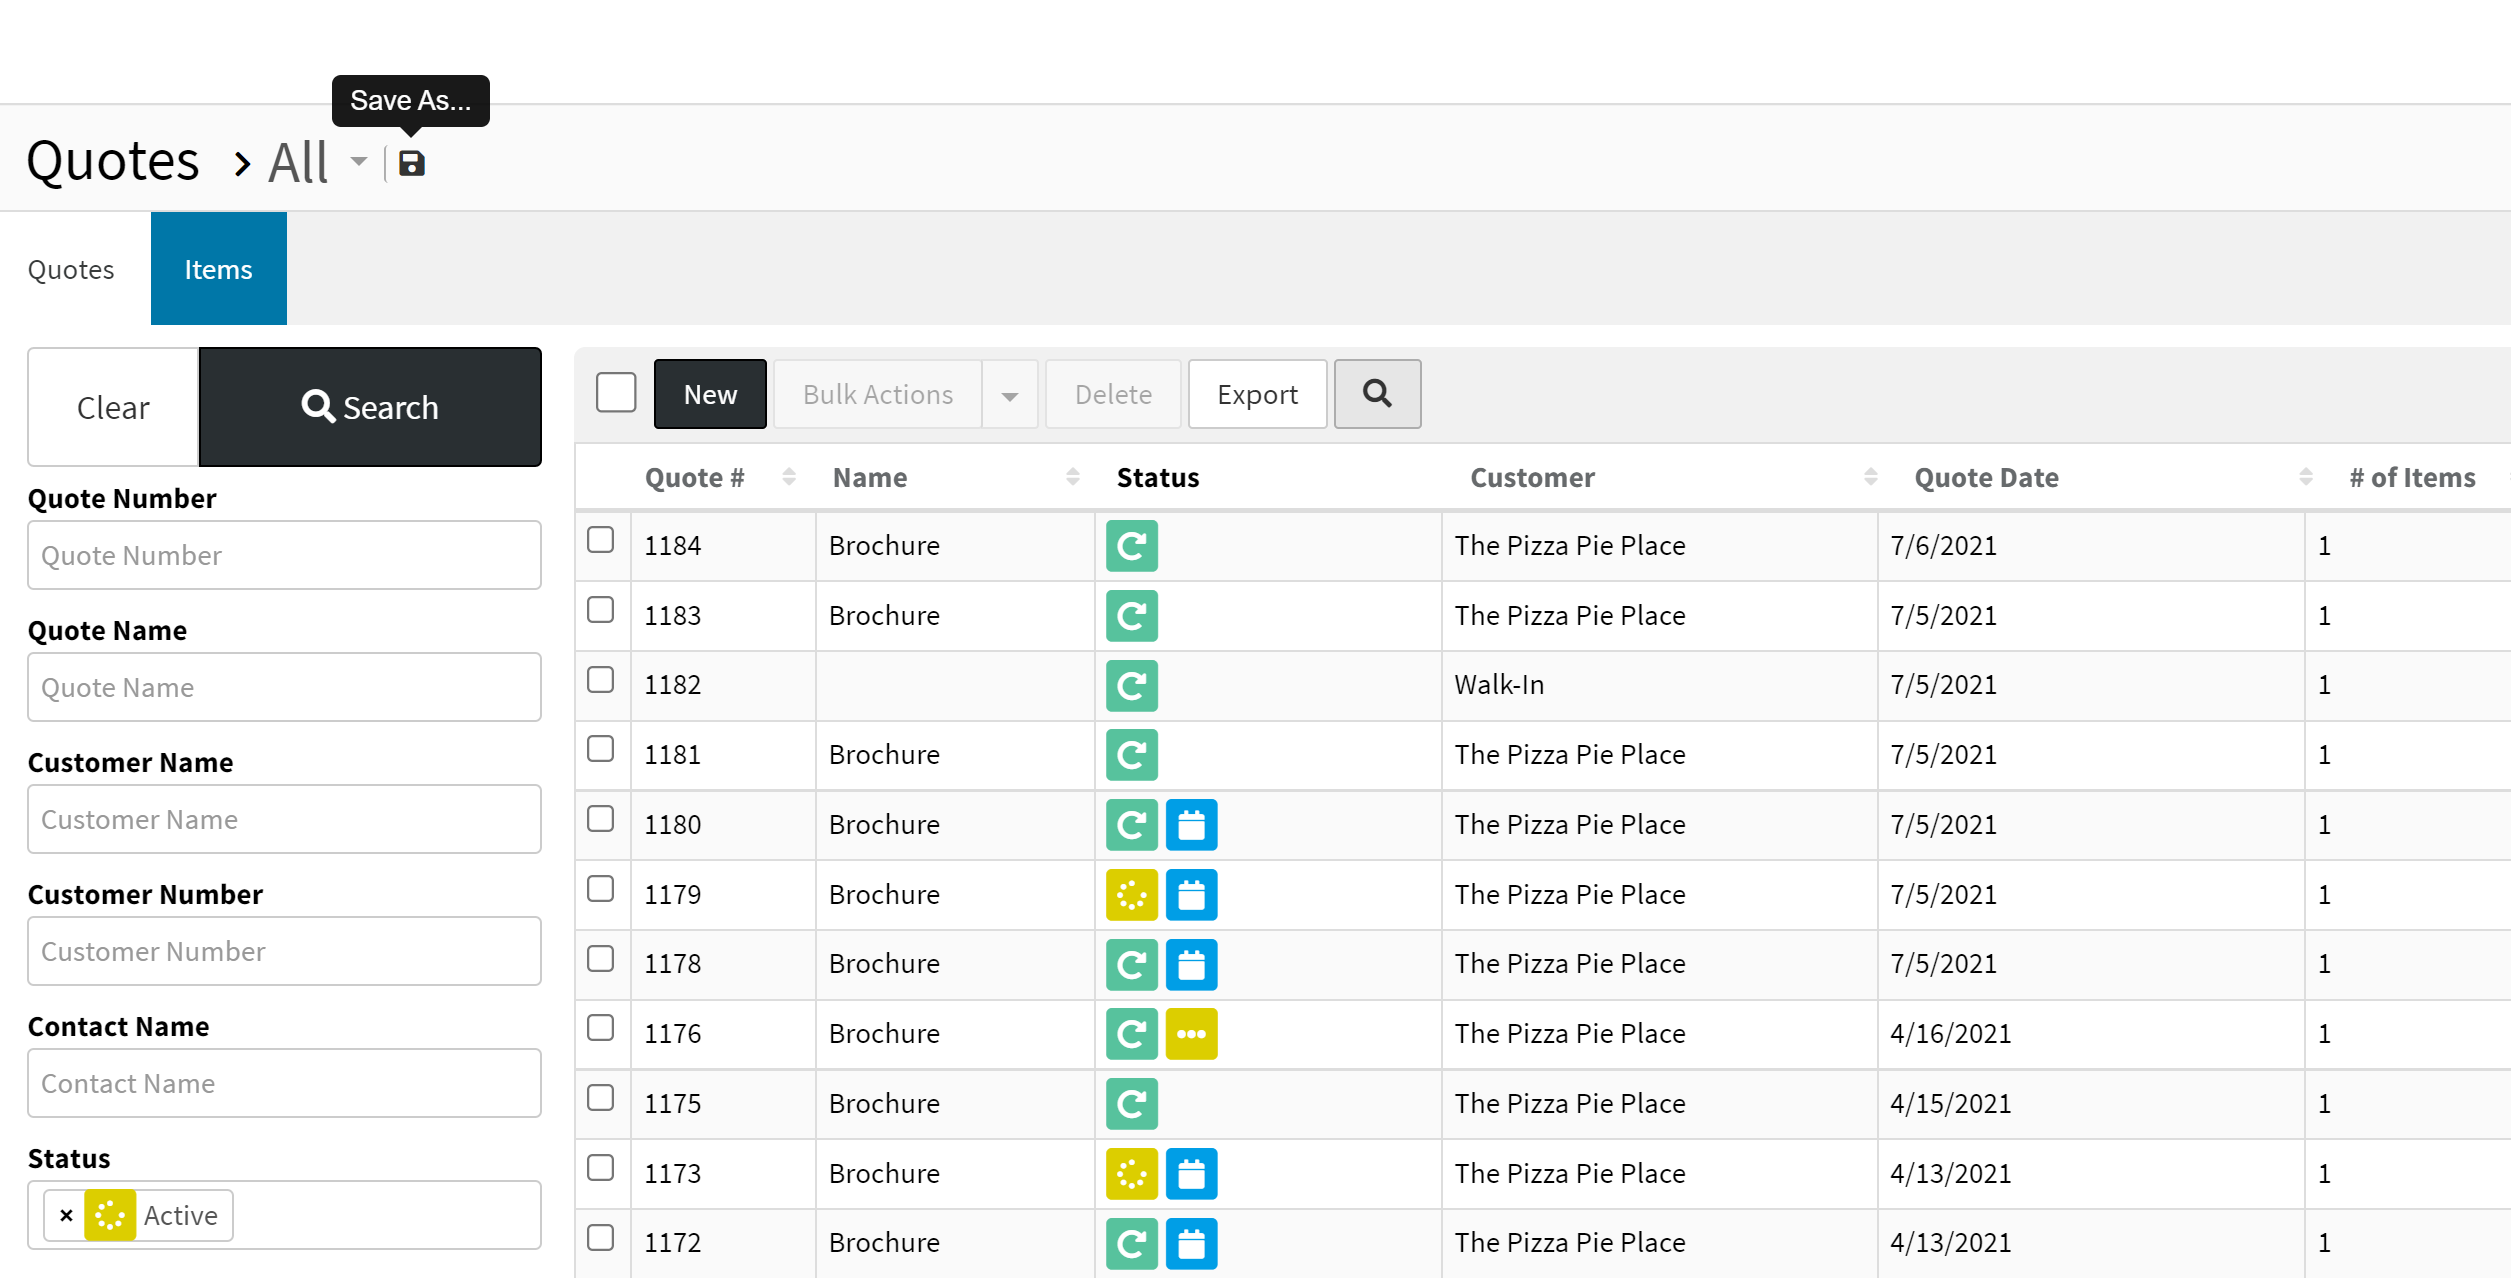
3. Select the Disk icon to the right of All to save.
A Save Smart List modal window will open.
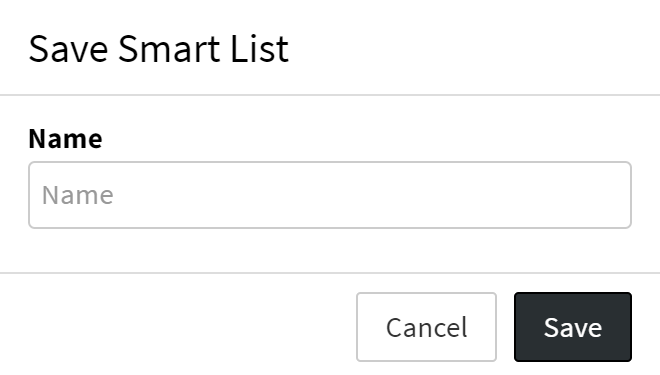
4. Complete the fields.
5. Select {Save}.
Opening a Smart List
Step Action
1. Navigate to the desired search page.
2. Select {All} to open the Smart List drop-down menu.
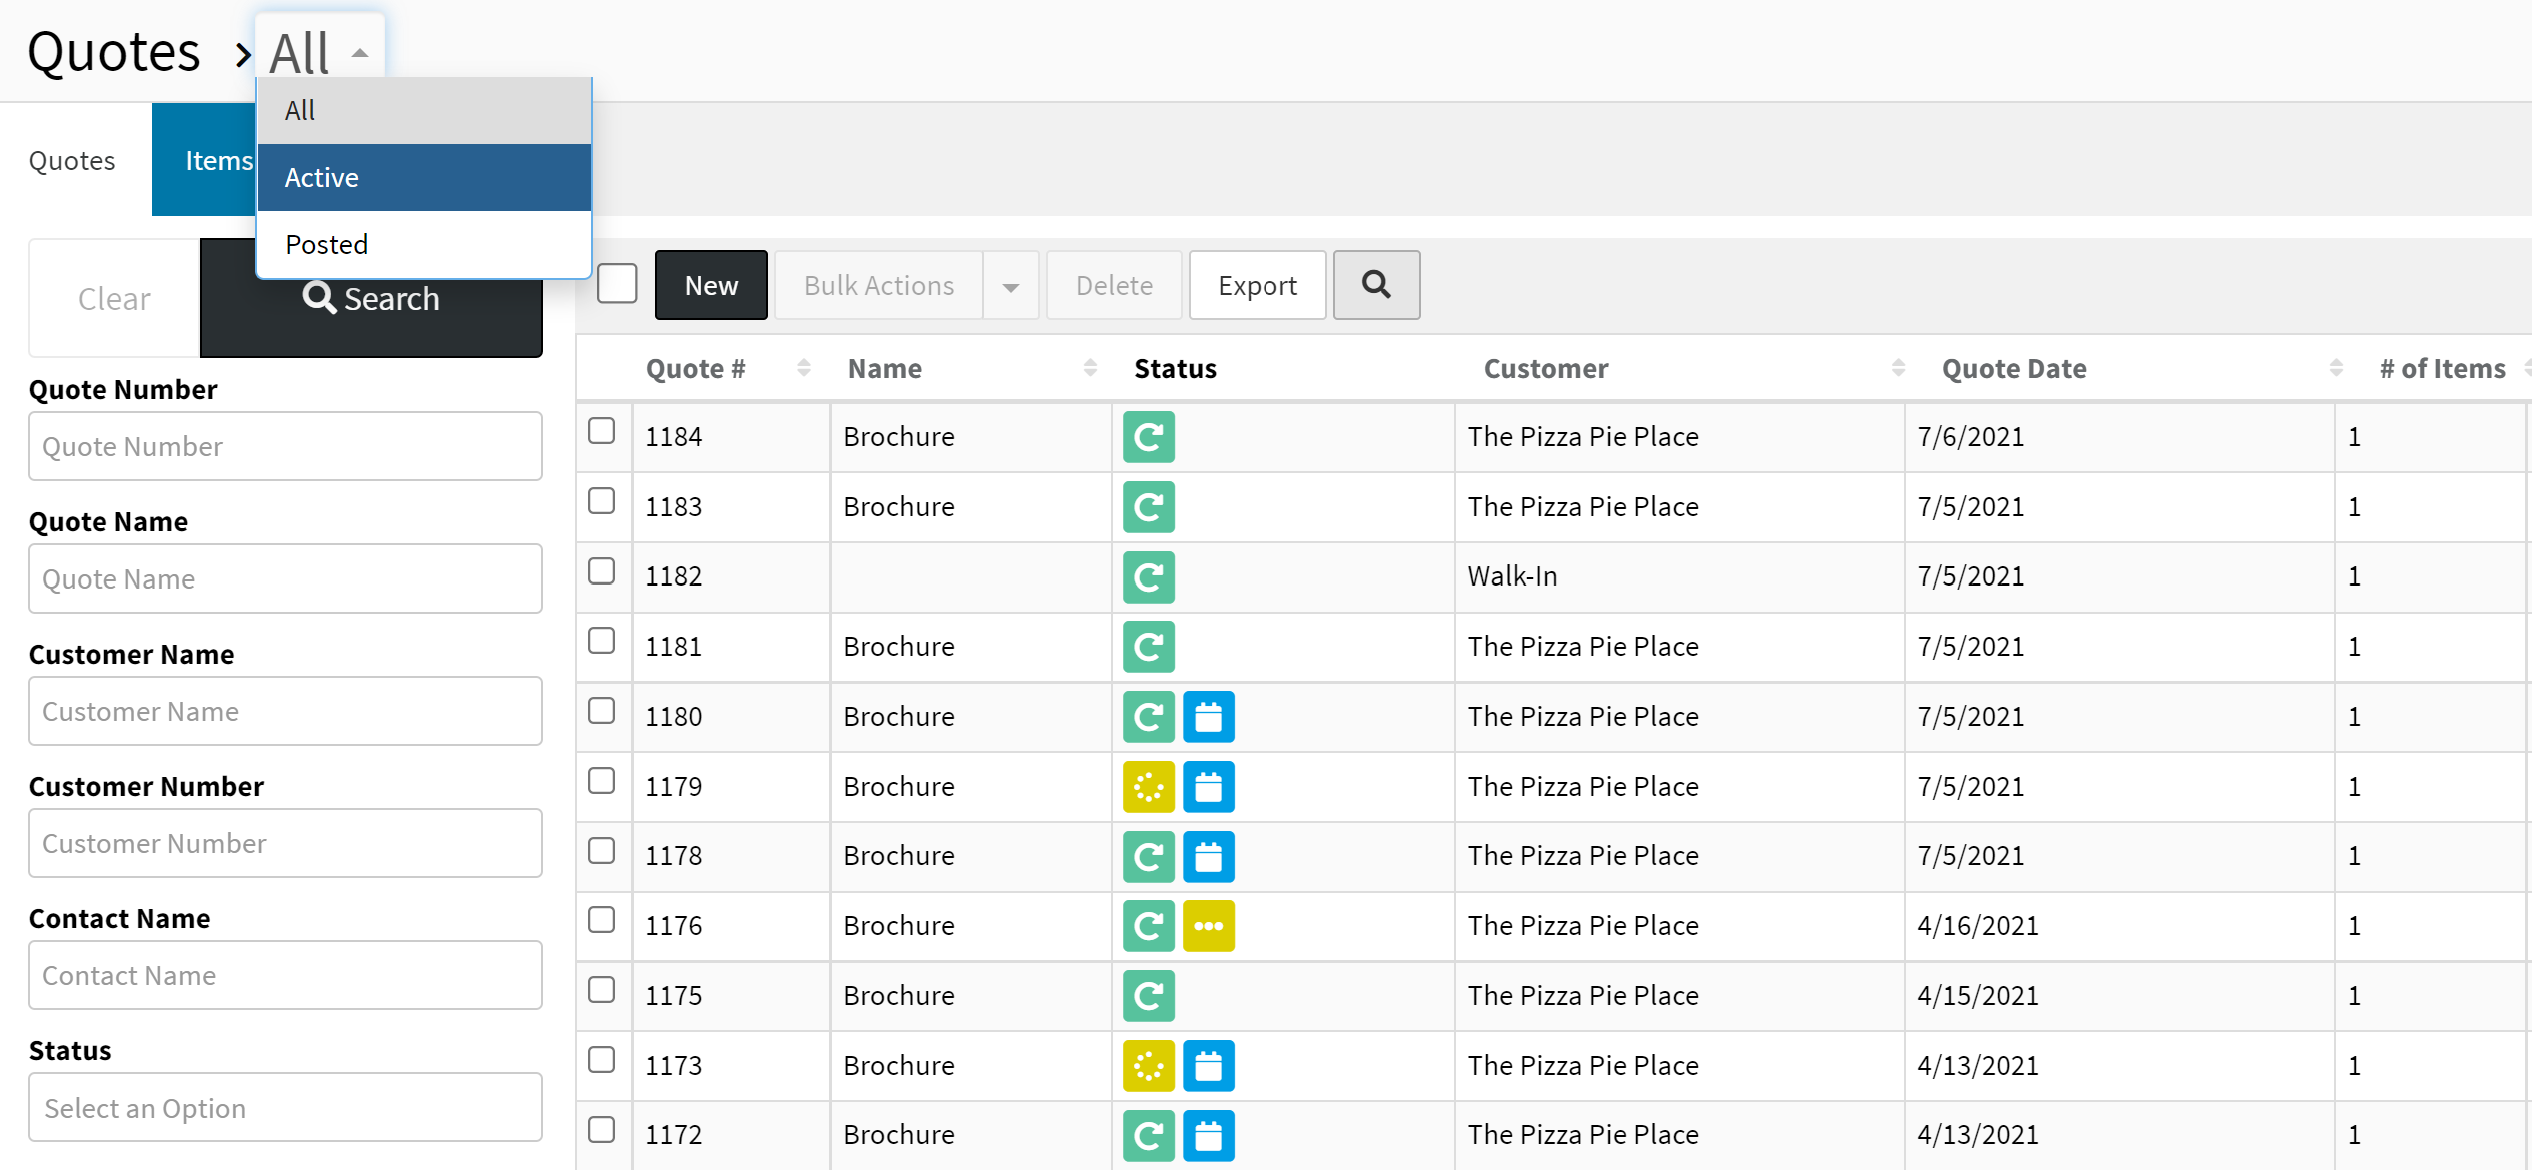
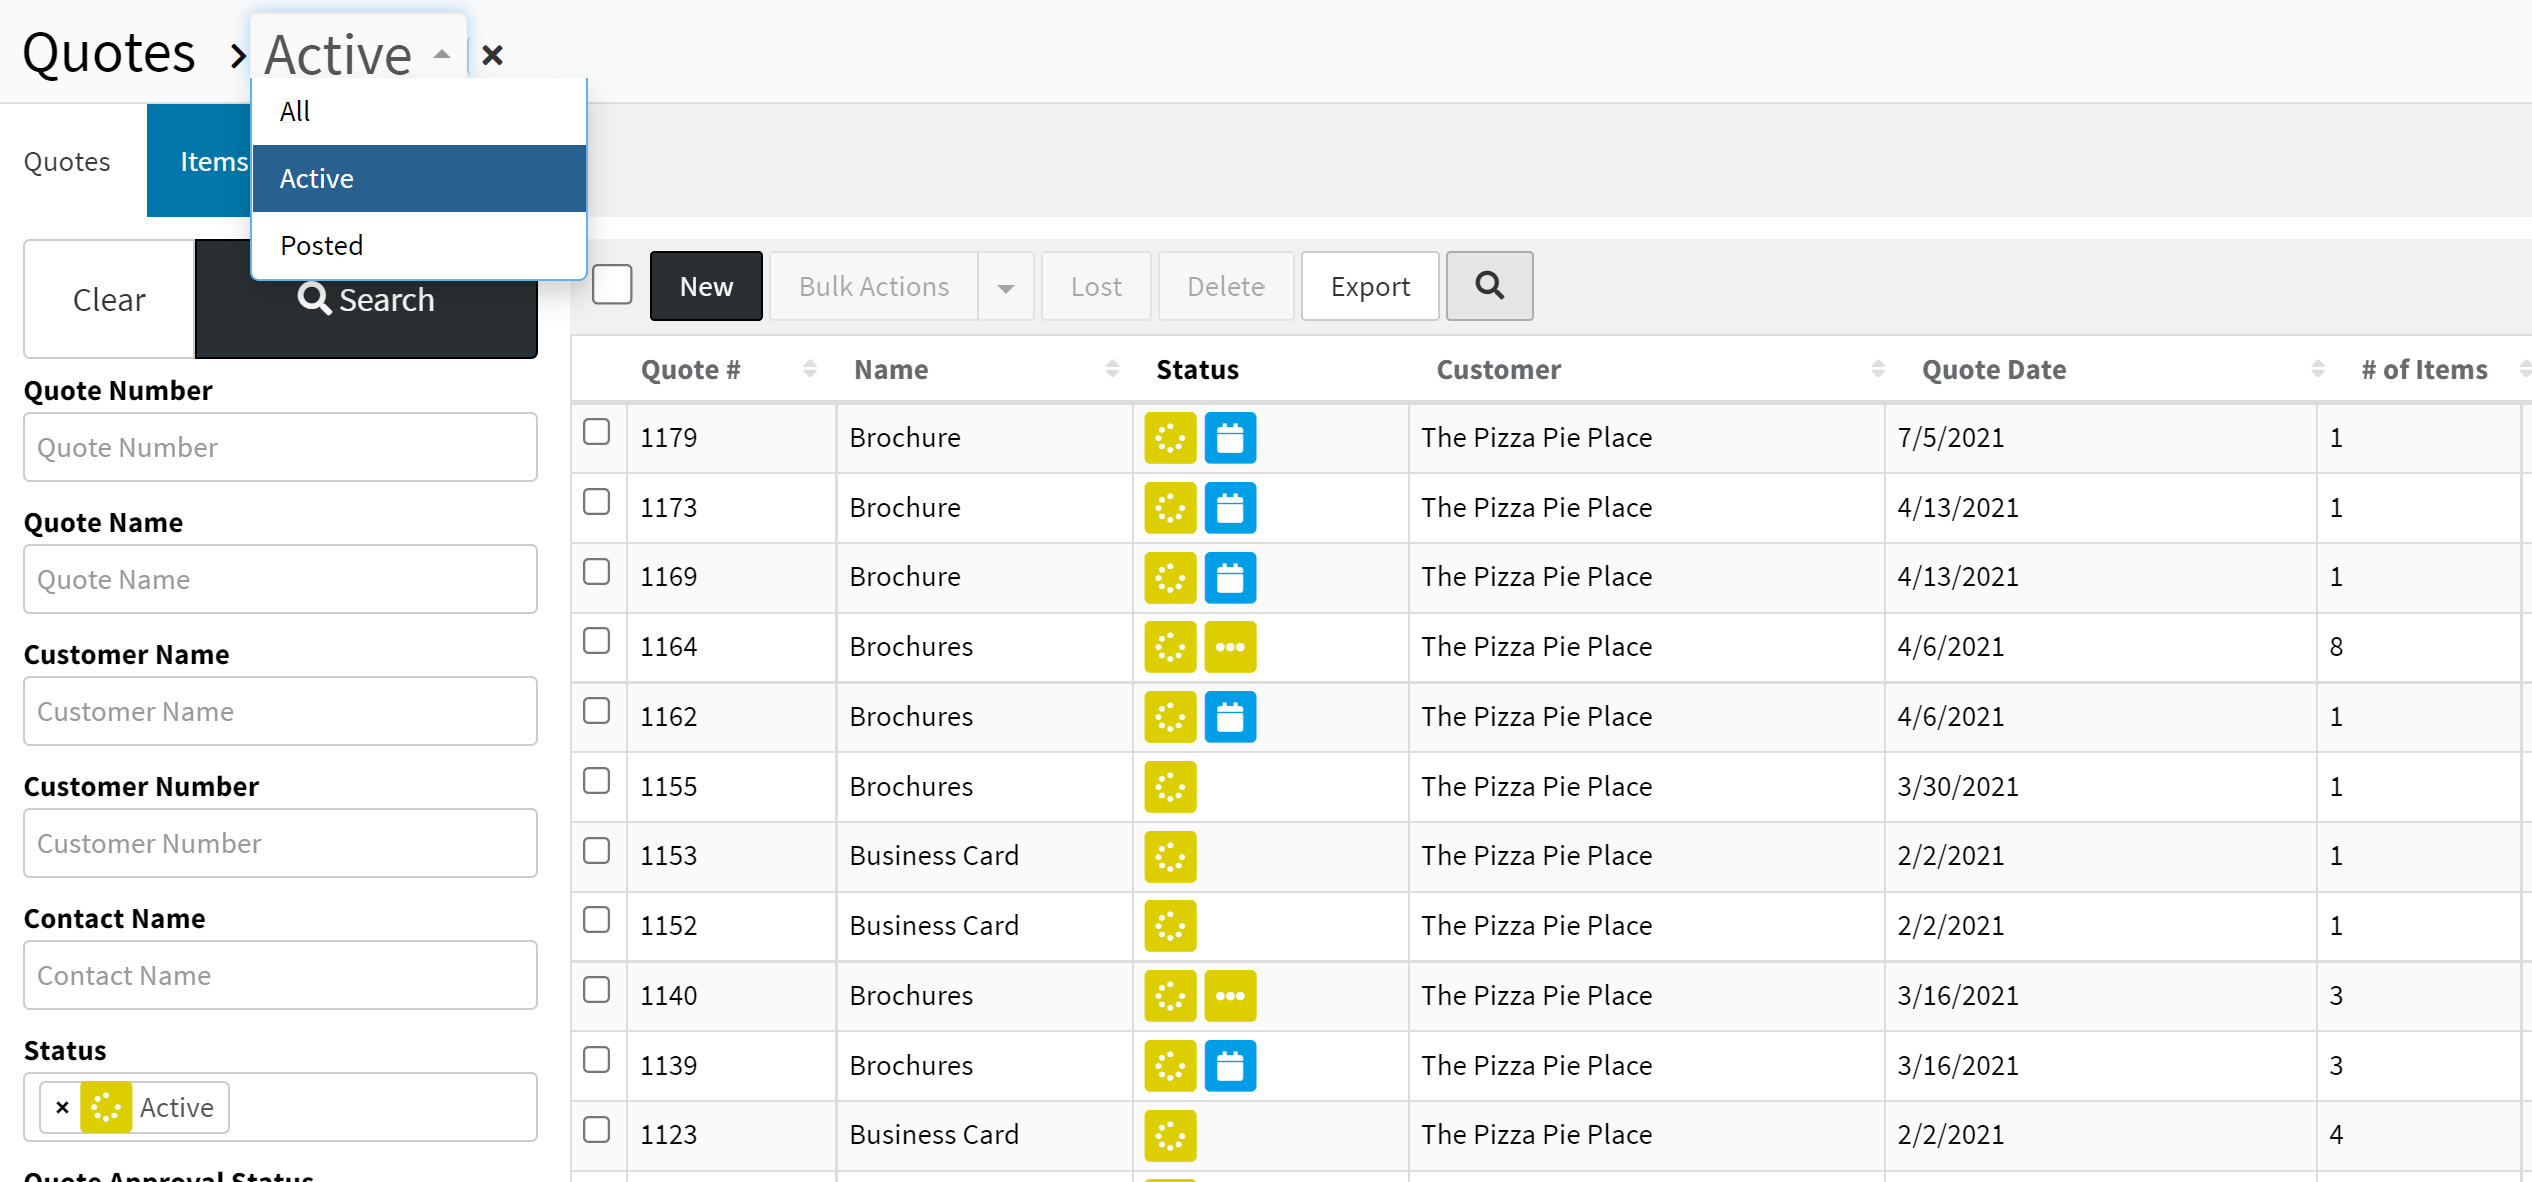
3. Select the desired Smart List. The search page will refresh and the Smart List name will now
appear to the right of the search page name.
Editing a Smart List
Step Action
1. Navigate to the desired search page and open the smart list, if necessary.
2. Change search filters, adding or removing values as required.
3. Select {Search}. A Checkmark icon will appear to the right of the smart list name.
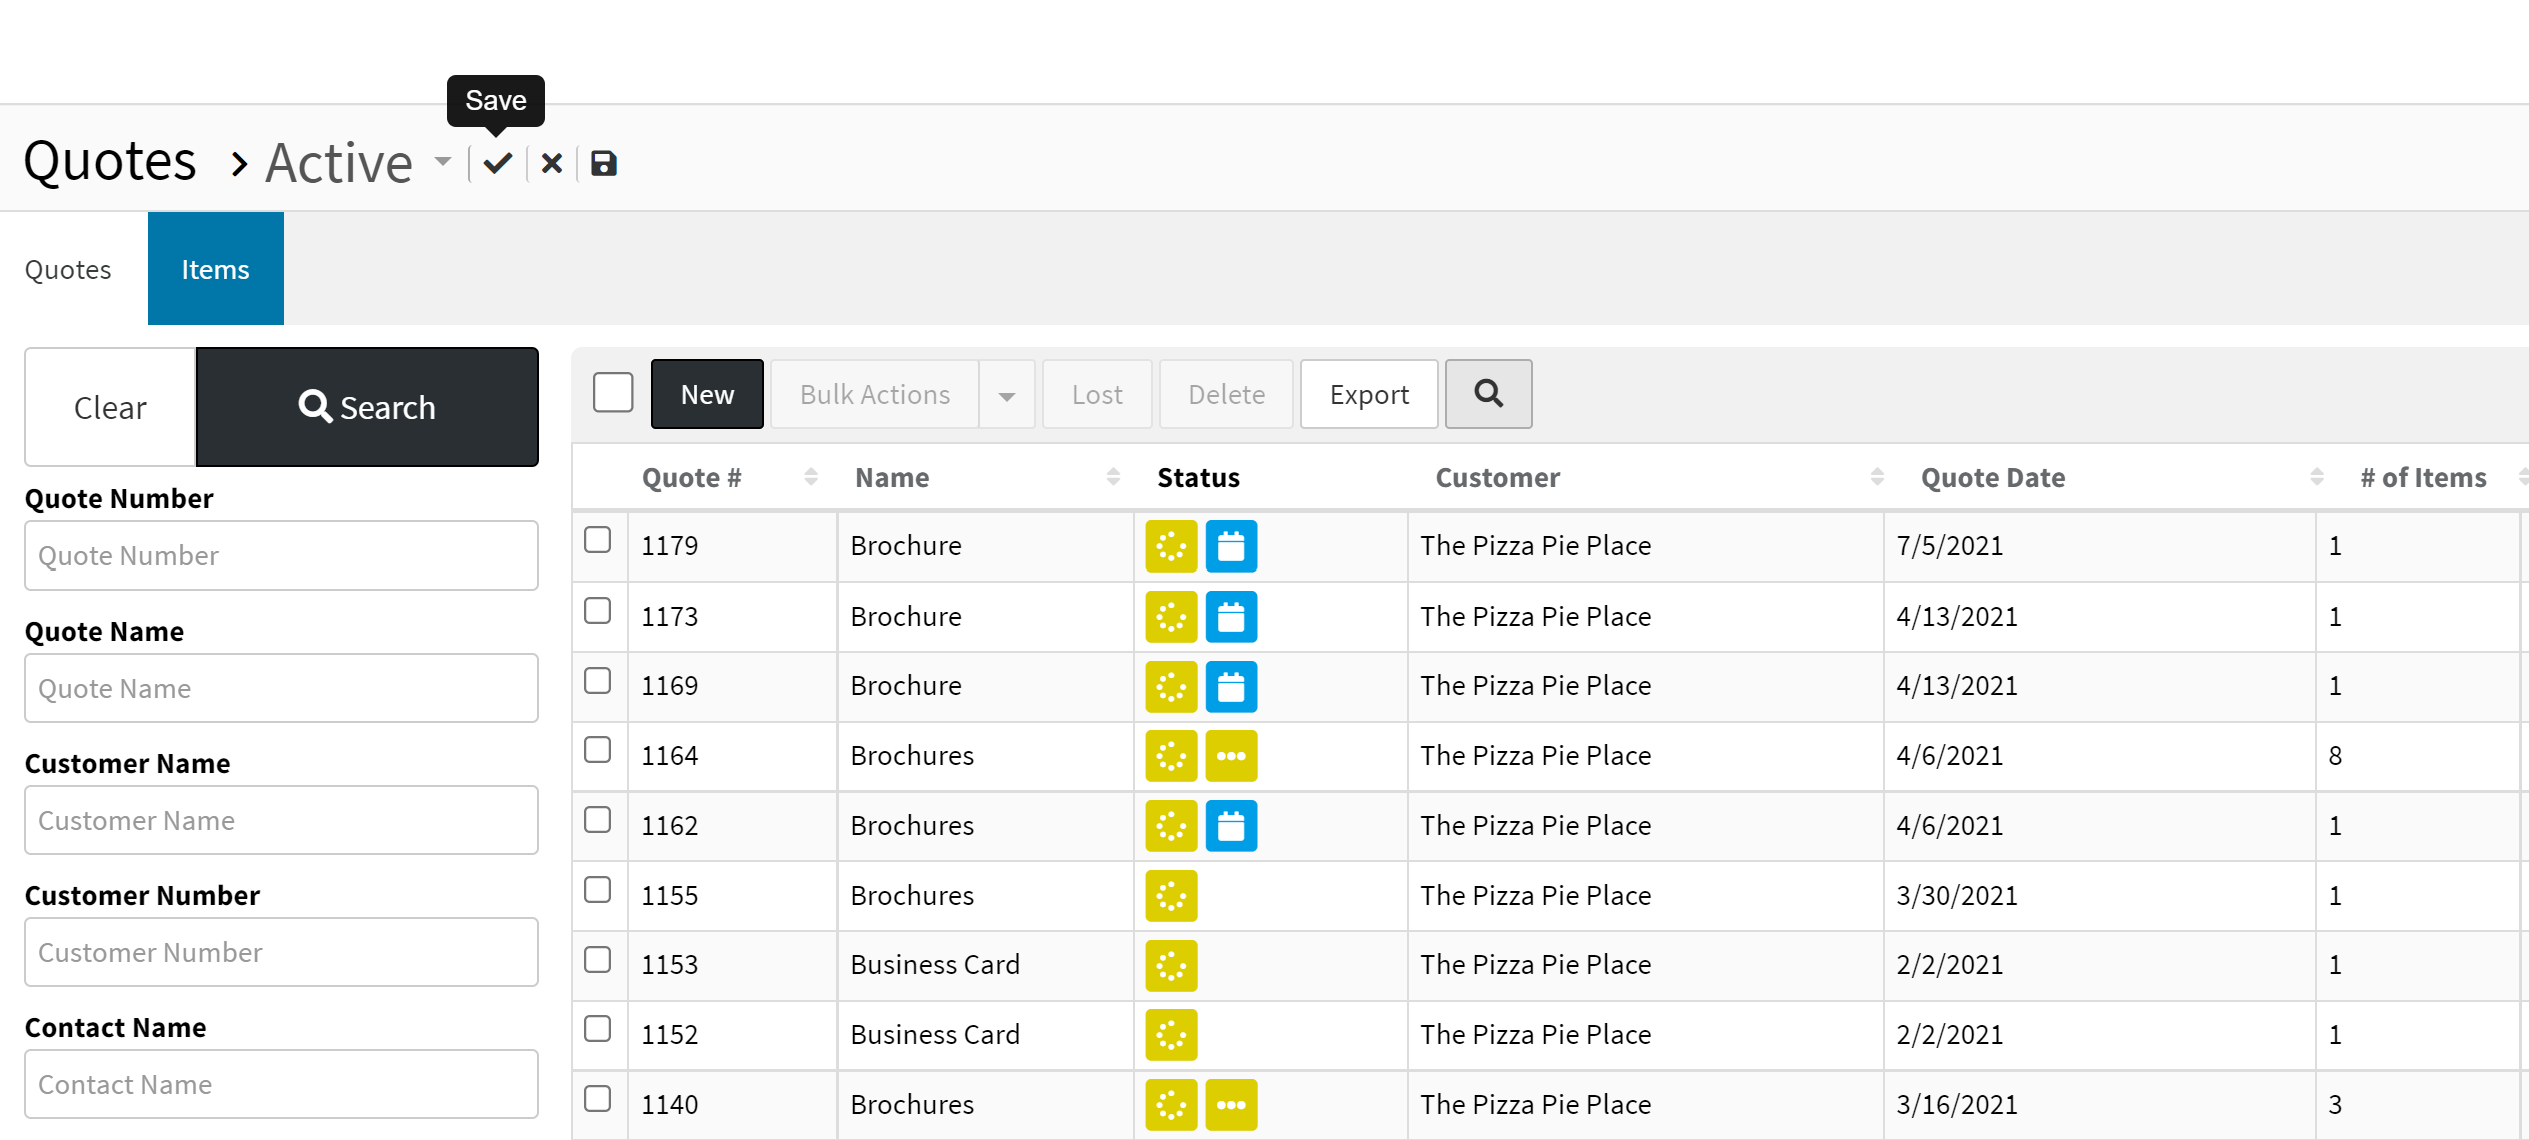
Note: Clicking the Floppy Disk icon will save this search as a New smart list.
4. Select the Checkmark icon to save.
Deleting a Smart List
Step Action
1. Navigate to the desired search page and open the smart list, if necessary.
2. Select the X icon to the right of smart list name to delete it.
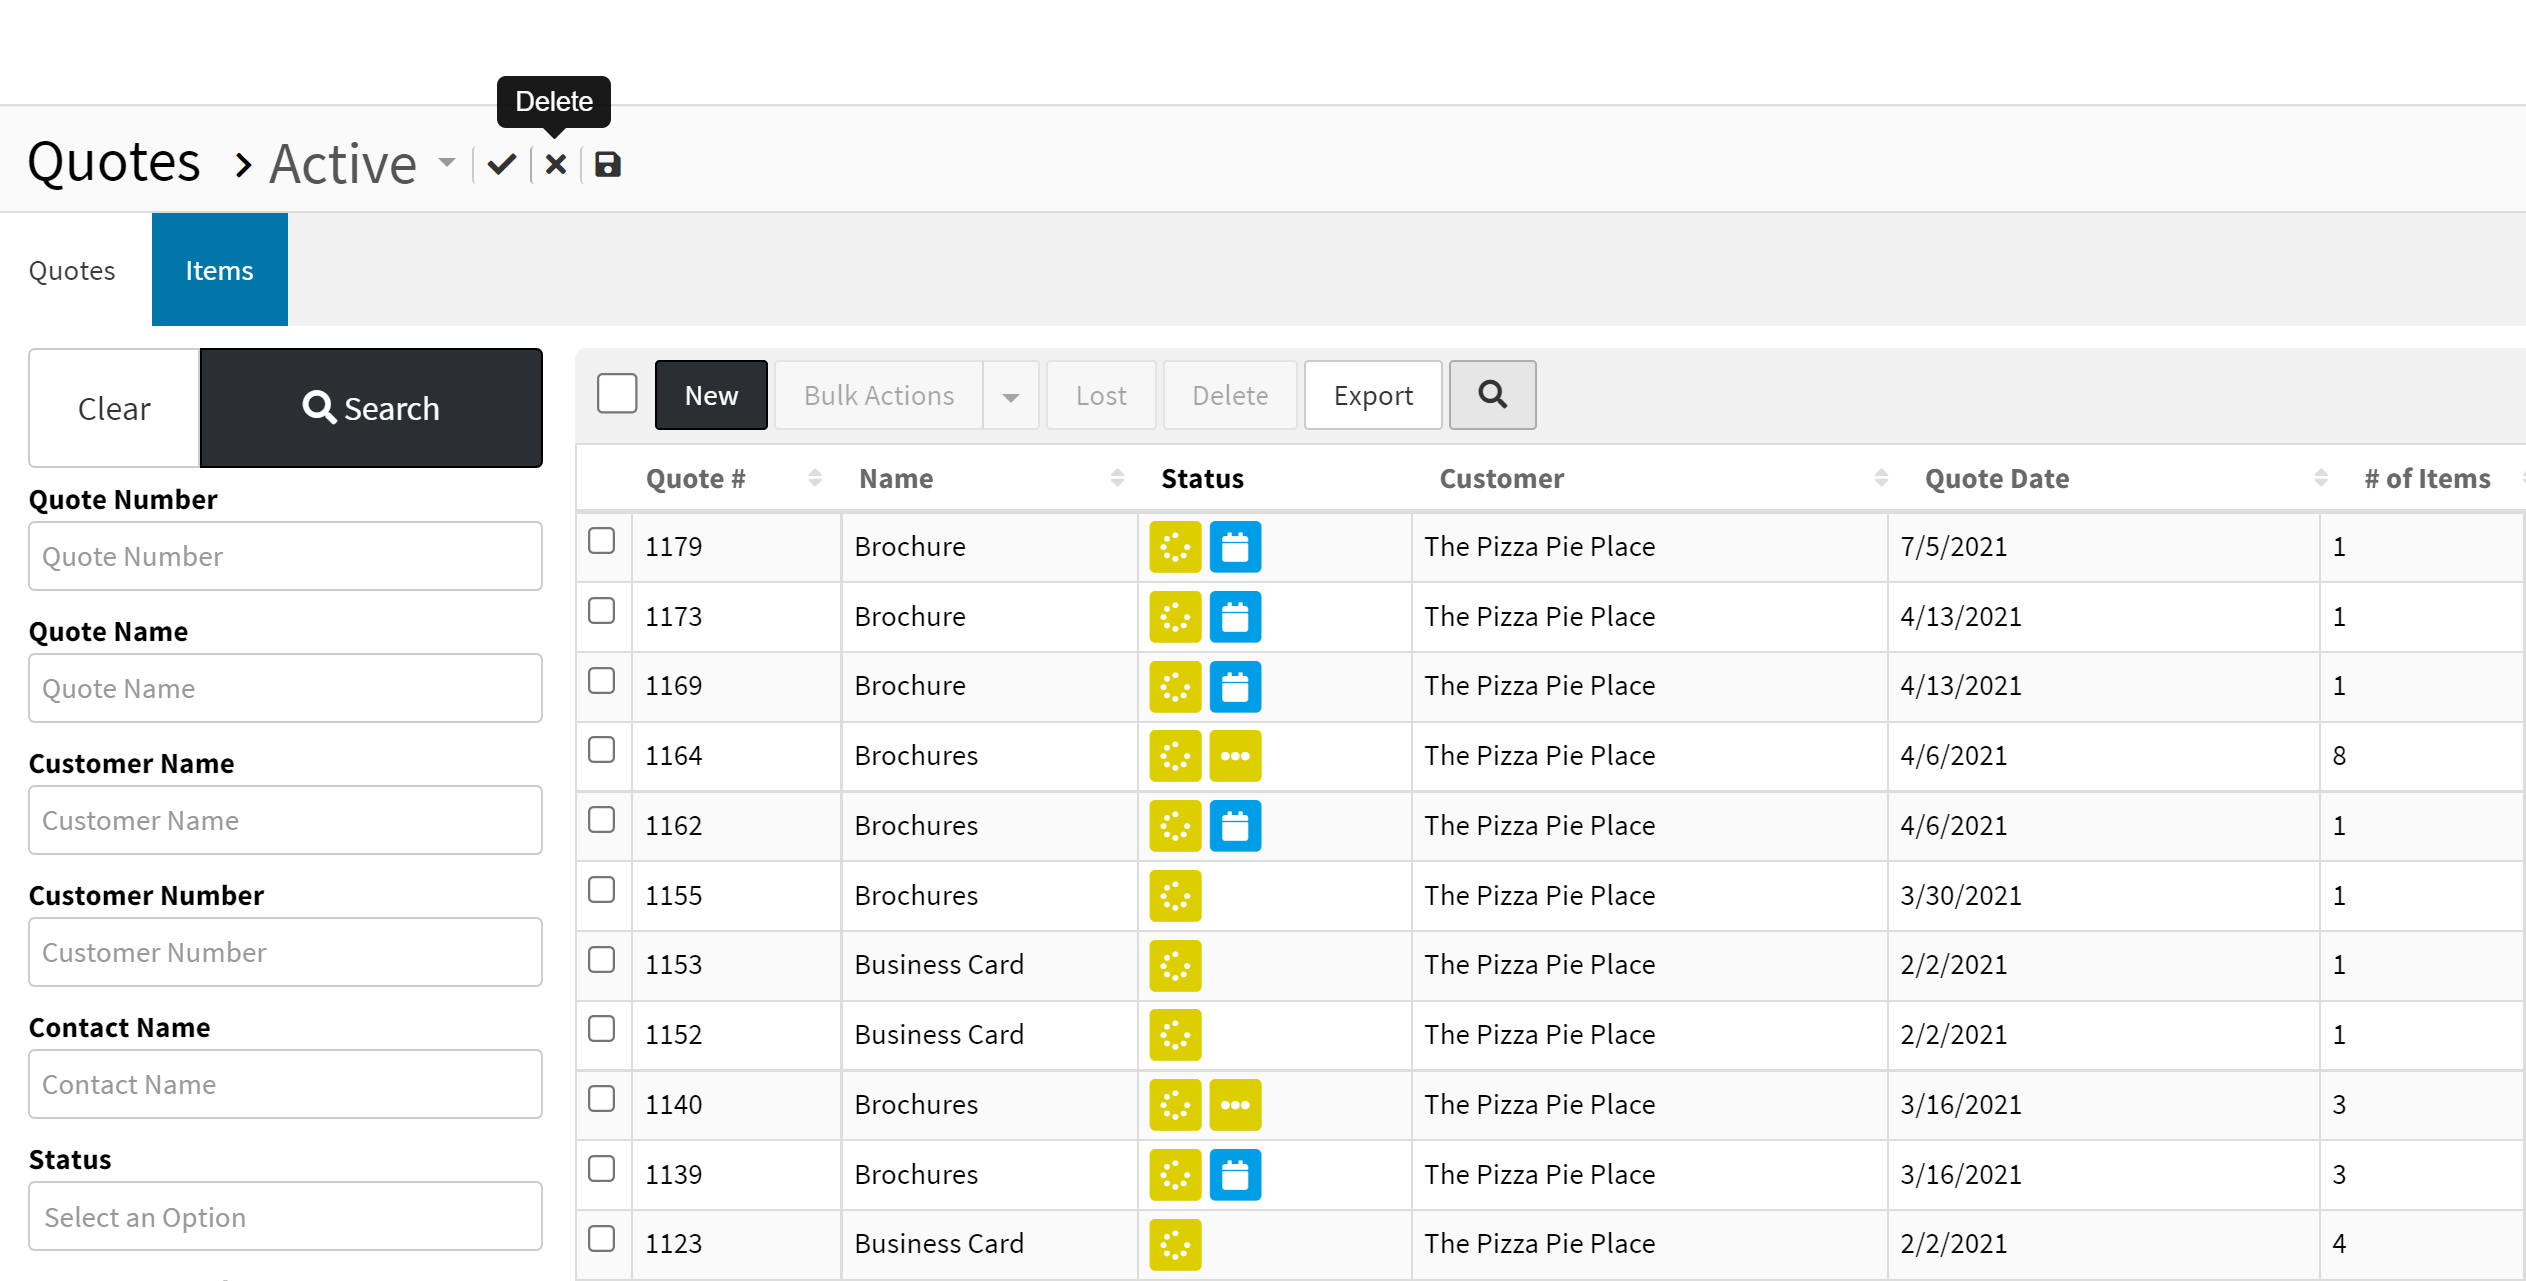
A window will pop-up to confirm selected smart list to be deleted.
3. Select {OK}. A pop-up will confirm smart list successfully deleted.